A flush conservation rooflight is set so low that its glass stands only a little proud of the tiles or slates around it. From the lane it reads as a thin dark line in the roof plane, much as the old cast iron lights once did. Getting it there is a matter of a few tens of millimetres, and those millimetres are won or lost in the battens, the lead and the way the frame is bedded. This guide follows the job from the bare roof upwards, so you can see what a low profile conservation skylight asks of the roof, what it asks of the installer, and why a quiet room depends on the same small details as a neat elevation.
What flush means on a pitched roof
Flush does not mean level with the tiles. It means the rooflight sits as close to the roof plane as the covering and the water-shedding details allow, with a slim frame and a shallow rise.
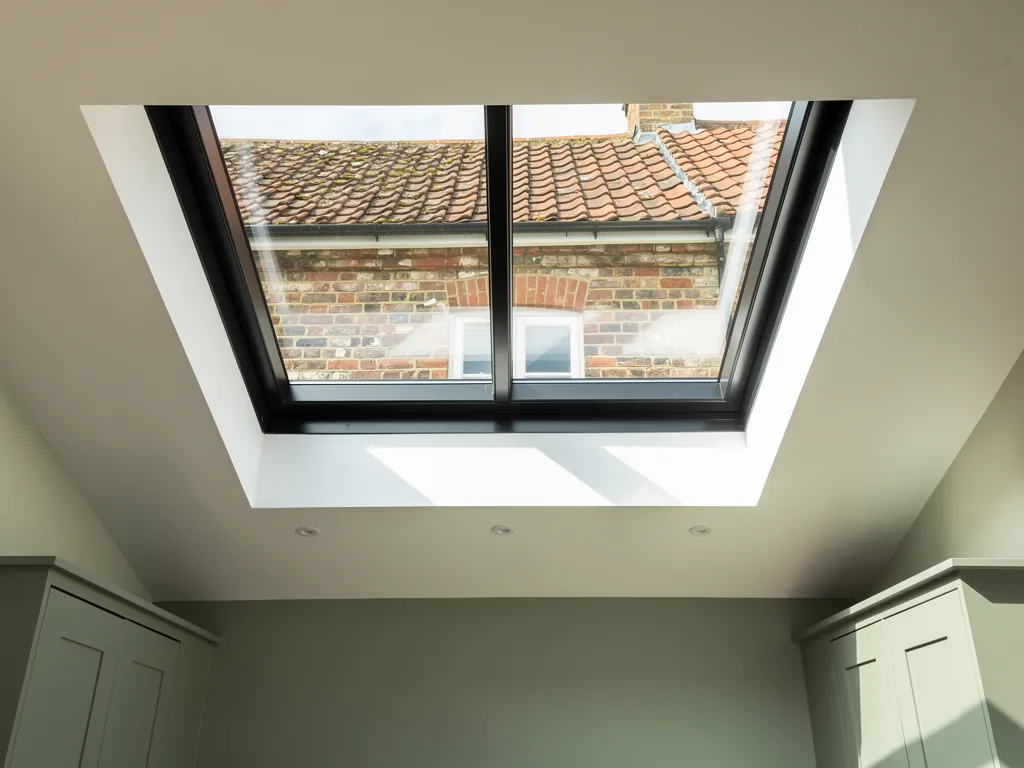
A standard roof window is a box on the slope. Its casement stands up from the tiles, its frame is deep, and its flashing kit is built to collar that depth. A conservation rooflight is shaped differently. The frame is a narrow bar of steel or aluminium, the glass sits in a rebate, and the whole unit is made to drop down into the rafter opening so that the top of the glass ends up a short way above the tile faces. The height that remains is the upstand of the frame over the roof covering. It is what you see in profile from the garden, and it is what a conservation officer looks at on a site visit.
Two things set that height. The first is the product itself: the depth of the frame, the thickness of the glazed unit and the way the manufacturer intends the flashing to lap. The second is the roof: the thickness of the tile or slate, the depth of the battens and whether the opening can be dressed down into the rafters. The installer cannot change the product, but the roof detail is ours, and most of the flush look comes from it.
If you want the plain definition first, the guide on what a conservation rooflight is covers the frame, the glass and the reasons the design exists. This page takes it as read and concentrates on the fixing.
Surveying the tiles before a single one is lifted
The survey for a low profile conservation skylight is mostly a survey of the roof covering. The glass size matters, but the tiles decide how the job will go.
We start from outside when the weather allows. We look at what the roof is covered in, how old the battens are likely to be, whether the courses run true and whether the ridge and eaves have moved over the years. A roof that has sagged a little between rafters will not give a straight line for a frame to follow, and that shows up as a wavy gap at the glass edge if it is ignored. Then we go into the loft and look at the same place from underneath.
From inside we check four things.
- The rafter spacing and depth, which set the width and height of the opening and whether a trimmer is needed.
- The condition of the timbers around the opening, because a new frame is only as good as what holds it.
- Any underlay or sarking, its age and whether it can be lapped into the new detail.
- The clear route for the light well below, including insulation depth and the ceiling line.
This is also where we listen. A loft bedroom under the Gatwick departure routes hears the roof differently from a barn conversion in the Weald, and the survey note records what the room hears. That note feeds the quiet spec that comes with every quote, including the glazing build and seals we propose for that room.
The four layers that decide the profile
Every low set rooflight is a stack: rafter, underlay, battens, covering, and then the frame on top of or within them. Shave a layer and the rooflight sits lower. Add one, and it climbs.
The rafter sets the floor. The frame is carried on a timber upstand trimmed to the opening, and its lower edge is usually bedded on the rafter tops or a short packer. The underlay then has to be lifted and lapped so that any water that gets under the tiles runs down onto the frame and out, never behind it. The battens come next. They carry the covering, and they are cut back and stopped short of the opening so the frame can sit down into the gap. Then the tiles or slates close around the frame through their own flashing.
The table below sets out what each layer does for the profile and what we watch for.
| Layer | What it does | Effect on height |
|---|---|---|
| Rafters and trimmer | Carry the frame and set the opening | Set the lowest point the frame can reach |
| Underlay | Catches water and leads it round the frame | Adds almost nothing if lapped well |
| Battens | Carry tiles or slates | Cut back to let the frame drop down |
| Covering and lead | Shed water onto and off the frame | Sets how much of the frame shows |
Nothing in that stack is exotic. The skill is in the order and the tolerances, because a few millimetres in the wrong layer becomes a visible lip against the roof line.
Battens, counter battens and the gap that matters
The battens are the detail that most often stops a rooflight sitting low. A roof that has counter battens over the rafters gives more height to work with than a roof that has battens laid straight onto the underlay.
On a traditional roof the tile or slate battens run straight across the rafters, with the underlay sagging between. The rooflight frame can drop through the opening to sit on the trimmed rafters, and the battens simply stop either side. That gives the lowest profile. On a roof that was re-covered in recent decades, the battens are more likely to sit on counter battens that run up the slope. There the space under the covering is deeper by the thickness of the counter batten, and the frame has to either sit higher on a packer or be dressed into that gap with extra care.
Where the covering is to be lifted and relaid, the opportunity is greater. We can cut the battens back to a clean line, fit a short trimmer where the opening needs support, and lay the tiles or slates back in a neat margin round the frame. Where the roof is sound and we are cutting into it, we work from the rafter opening outwards and disturb as few courses as the detail allows.
The gap between the frame and the first full course matters just as much. Too tight, and the flashing has nowhere to lap. Too wide, and the frame looks like a hole in the roof. We set out the margin on the ground before any tile comes off, so that the tile cuts land on clean lines rather than slivers.
How lead and flashings hold the line
The flashing is what makes a low frame safe. It is also the part you see most closely, because it forms the thin border between frame and roof.
A conservation rooflight on tiles or slates is normally weathered with lead, or with a lead-like flashing kit supplied for the product. Lead is dressed to the profile of the covering, so a plain tile gets a soaker at each course and a slate roof gets a neat step at the side. It is malleable, it lasts, and it takes the shape of an old roof with its small irregularities. Stock lead sheet is graded by code, with heavier codes used where the sheet has to do more work. The code is chosen for the position: a wider apron at the bottom of the frame, a fine step flashing on the sides, and a back gutter or saddle at the top where water from the slope above has to divide and pass round.
Each edge has a different job.
- The sill apron sits over the covering below the frame and carries water onto the tiles or slates beneath.
- The side flashings step or soak in with the courses so the side joint looks like part of the roof.
- The head, or back gutter, sits above the frame and turns water round the sides rather than into the top edge.
The installer keeps those three edges tight and low. A lead apron is dressed down to hug the covering, and any lead that stands proud is trimmed back or pressed in so it does not catch the light or the eye. Where the roof covering is uneven, the lead is dressed into the undulations so the joint follows the roof, not a ruled line.
The shape of the roof covering changes the detail. A thin natural slate is a tight lap with a small margin, and fitting conservation rooflights in slate roofs is a different exercise from working into a plain tile roof. A deeper profile or a rough stone slate adds thickness and unevenness, and the flashings have to rise with it.
Plain tiles, tile hanging and stone
The covering sets the rhythm of the job. Each material hides a flush rooflight in its own way.
Plain clay tiles are small and lap by two courses, so the frame can be surrounded by short courses that cut close around it. The soaker flashings are cut from small pieces of lead and form a stepped line that blends with the tile edges. The curve of the tile face also helps, because the eye reads the small dark frame as one more line in a busy surface. The same ideas apply across the Weald where the roofs are clay, and the page on conservation rooflights for clay tile and tile-hung roofs goes through them.
Larger stone slates, like the Horsham stone covering that belongs to parts of the local countryside, are thicker and heavier. A flush frame has to be raised a little to clear the stone thickness, and the courses are laid in diminishing sizes up the roof, so the cut around a frame takes planning. The notes on conservation rooflights in Horsham stone roofs cover the extra weight and the cutting.
A barn conversion is a different kind of roof again, often with long rafters, wide spacing and deep battens set for a large tile. That mix of a long run and a wide opening means the detailing is about keeping the frame in scale with the slope. See conservation rooflights for barn conversions for that case.
Frame material and the depth you see
The frame is the part of a rooflight you can measure with your eye from the ground, and its depth decides how much of the profile is left to hide.
A slim steel frame is the thinnest, and it gives the classic look. Aluminium can be cut almost as fine and comes in a wider range of finishes. Both are made with a shallow rise over the roof, and the thermal break and glazing rebate hide within the frame depth. Pick a deeper section and the whole unit sits taller, however carefully it is bedded. The comparison of steel or aluminium conservation rooflights is the place to weigh those choices. Glazing bars also change the look from the ground, as the page on glazing bars on conservation rooflights explains.
Finish matters as much as depth. A dark, matt frame on a dark slate roof absorbs into the covering and loses its edge. A bright finish makes the same frame stand out. The guide to what colour a conservation rooflight should be gives the reasoning, and a good rule is to match the covering, not the window frames of the house.
Planning height and the rise above the roof plane
How far a rooflight stands off the roof is not only a matter of looks. It is also a number in the planning rules.
Under the general permitted development rights for houses, a roof light inserted in the roof slope must not protrude more than 150 millimetres beyond the plane of the slope. A flush conservation rooflight sits well inside that figure, which is one reason the style is so often the answer to a planning condition as well as a taste. That allowance does not apply everywhere. Listed buildings have none of those rights, a conservation area can carry its own controls, and an Article 4 direction can remove the allowance from a street. The position has to be checked for the address before you commit to a design.
The planning pages on the site go through the routes. Planning consent for conservation rooflights covers when an application is needed, and listed building consent for a new rooflight covers the listed case. If you want the official wording, the Planning Portal and gov.uk publish the permitted development rules for householders.
A tidy job inside the roof
A flush rooflight is neat on the outside because the work underneath is tidy. The inside of the opening is where light and quiet are either kept or lost.
Below the frame, the opening is lined with a splayed or plumb light well, finished in plaster or board and painted in a light colour. A well that splays outwards as it drops spreads the daylight across the room. It also gives the space for insulation around the opening, and a continuous line of insulation, tight to the frame, is what stops a cold edge forming at the ceiling.
The same details govern sound. A thin frame bedded on a soft or gappy seat lets sound slip round the glass, and a loose seal rattles on a windy night. We bed the frame on a continuous seal, close the gap between frame and timber with a flexible filler and set the glazing in fresh gaskets. Where the room is under a flight path or beside a railway, we may specify a laminated acoustic inner pane in the sealed unit, and we write that into the quiet spec, along with the seal and upstand we chose. The page on quieter glazing for conservation rooflights goes through the options, and the note on rain noise on conservation rooflights deals with the drumming question that a slim metal frame sometimes raises.
Building Regulations and what we notify
A new rooflight in a roof is building work. The fixing, the thermal performance and the safety of the glass all come under the Building Regulations.
We install to current Building Regulations and we handle the Building Control notification where the work is notifiable. Part L sets the thermal performance for new and replacement glazing in a dwelling, so the glazed unit needs a suitable centre-pane and frame value. Part K concerns safety glazing, which matters where the glass is within reach of a floor or a stair, for example in a low roof over a landing. Part B matters for fire spread near a boundary, and the position of a rooflight relative to a neighbouring property can affect the choice of glass. Part F covers ventilation, which is relevant where a rooflight adds to or replaces a ventilation route. Safety for people on the roof during the work is ours to manage, and the frame has to carry the load of the glass and any snow.
A conservation rooflight that is double glazed can meet those performance targets with a slim frame, which is why the answer to are conservation rooflights double glazed is yes for current units. The heat loss figures for a typical unit are set out in the guide to double glazed conservation rooflights and heat loss.
What we do on the day
The order of work on the roof is fixed by the weather and by the detail, and a flush fit follows a steady sequence.
We cover the room below first, then set up access and a safe working platform. The covering is stripped back from the opening by the planned margin, the tiles are stacked for reuse, and the battens are cut back to the marked line. The rafters are trimmed and a short trimmer fitted where the opening needs it. The underlay is lifted, cut and dressed so that it laps onto the frame.
The frame then goes in. It is checked for level along the slope and across it, bedded on its seal and fixed through the upstand. The lead is fitted from the bottom upwards, with the apron first, then the side steps, then the head. The covering is laid back around it, and any cut tile is dressed to a clean edge. The glass is cleaned and the light well is finished. Before we leave, we check that the room is left as we found it.
The work carries a 10-year workmanship guarantee, described on the guarantee page. The hub for the whole service is conservation rooflight installation in Crawley.
Sizes that keep the profile low
The larger the rooflight, the harder it is to keep it looking low. A big frame has more glass, more weight and more flashing to hide.
On a pitched roof the eye reads a rooflight against the tile courses. A unit that spans several courses in height looks natural, while one that spans a whole slope starts to look like a window. The safest size is the one that lines up with the rafter spacing so that no rafter has to be cut and trimmed, and the flashing stays compact. The page on choosing a conservation rooflight size goes through the maths, and the pitch of the roof sets a practical limit, which the guide to what roof pitch a conservation rooflight needs explains.
Where more than one rooflight is planned, placing them in a line, at the same height up the slope, gives the quietest elevation. A scatter of units of different sizes draws the eye and invites a question from the planning officer.
Questions about setting a rooflight low
These are the points that come up most once a homeowner has seen a flush rooflight in a neighbouring roof and wants the same.
Can any roof take a flush conservation rooflight?
Most pitched roofs with a tile or slate covering can, provided the rafters are sound and the pitch is within the range the product allows. A roof with deep counter battens or a heavy stone covering needs more care, and the frame may sit a little higher. A thatched roof is a special case, covered separately.
Will the rooflight sit exactly level with the tiles?
No, and it should not. The glass stands a short way above the covering so water can run off it and so the flashing can lap. The aim is a slim rise that follows the roof plane, not a recessed pocket where leaves and water collect.
Does a lower frame make the room colder?
The frame depth and the glazing build matter for heat loss, not the height above the tiles. A slim frame with a good thermal break and a sealed double glazed unit performs well, and the insulation we fit round the light well closes the gap at the ceiling.
How do I know the design will pass a conservation officer?
The officer looks at the profile, the frame size, the glazing bars and the position on the roof. A low, slim unit in a matching finish, placed on the rear slope and aligned with the courses, answers most of the points. The guide on what a conservation officer looks for in a rooflight lists them. To talk through your own roof, get a quote and we will survey it, or message us on WhatsApp.